3.1.16 The image libraries
The Pyret images library is based on the images teachpack in How to Design Programs, a textbook whose pedagogy has heavily influenced Pyret’s design (see Why Pyret? for more information). Note: this original library is written in Racket, a different language than Pyret. The examples in that file therefore do not work with Pyret as written; however, analogous examples are shown here. If you’re curious, you can find documentation for the images teachpack here:
Pyret supplies two modules for creating, combining, and displaying images. These two libraries supply the same set of functions, but with different signatures:
The image module functions take in strings for many of the arguments. To use this version of the library:
include image
import image as ...
If you are new to programming, or to Pyret, we recommend that you use this version of the library.
The image-typed module functions take in enumerated values. This second library is encouraged for use with the type checker, as it can give more precise feedback. To use this version of the library:
include image-typed
import image-typed as ...
While you cannot include both versions of the library simultaneously, you can import them both, if you would like to migrate from one version of the library to the other. (Note: The essentials2021 context already includes the untyped image library, so if you are using that context and want to use the typed image library, you must import it.)
Note that most of the examples below use the image version of this library, with arguments as strings.
3.1.16.1 Data Types
This section defines the key data types used in both versions of the image library. Wherever possible, the types are identical between the two libraries. When different, we will display equivalent versions of the types side by side.
The image library |
| The image-typed library |
|
| |
| ||
|
|
|
| ||
|
|
|
- color-named :: (
- name :: String
- )
- -> Color
Looks up the given string in the list of predefined colors. The names are treated case-insensitively. Hyphens in the names can be replaced with spaces, or can be dropped altogether. Unknown color names produce an error.
color-named("red")
 red
redcolor-named("blue")
bluecolor-named("bLUE")
bluecolor-named("sea-green")
sea-greencolor-named("sea green")
sea-greencolor-named("seagreen")
sea-greencolor-named("transparent")
transparentcolor-named("UNKNOWN")
- name-to-color :: (
- name :: String
- )
- -> Option<Color>
Looks up the given string in the list of predefined colors. Names are simplified as in color-named. If the color is known, then some Color value is returned; if the color is unknown, the function returns none.
name-to-color("red")
red)name-to-color("blue")
blue)name-to-color("transparent")
transparent)color-named("UNKNOWN")
Points represent two-dimensional coordinates on a plane. Points can be defined using either Cartesian or polar coordinates.
This constructor defines standard two-dimensional Cartesian coordinates.
A convenient synonym for point-xy.
This constructor defines two-dimensional polar coordinates. The angle theta should be specified in radians.
3.1.16.2 Basic Images
- circle :: (
- radius :: Number,
- mode :: FillMode,
- color :: ImageColor
- )
- -> Image
Constructs a circle with the given radius, mode and color.
circle(30, "outline", "red")
circle(20, "solid", "red")
Constructs an ellipse with the given width, height, mode and color.
ellipse(60, 30, "outline", "black")
ellipse(30, 60, "solid", "blue")
- line :: (
- x :: Number,
- y :: Number,
- color :: ImageColor
- )
- -> Image
Draws an image of a line that connects the point (0,0) to the point (x,y).
line(60, 30, "black")
line(30, 60, "blue")
line(-30, 20, "red")
line(30, -20, "red")
Creates a new image like img with a line added starting from the point (x1,y1) and going to the point (x2,y2). Unlike scene-line, if the line passes outside of img, the image gets larger to accommodate the line.
add-line(circle(20, "outline", "maroon"), 0, 40, 40, 0, "orange")
add-line(rectangle(40, 40, "outline", "maroon"), -10, 50, 50, -10, "orange")
3.1.16.2.1 Data types for drawing basic images
The image library |
| The image-typed library |
|
| |
| ||
|
|
|
| ||
|
|
|
| ||
|
|
|
3.1.16.3 Text
- text :: (
- string :: String,
- font-size :: Number,
- color :: ImageColor
- )
- -> Image
Constructs an image of string, using the given font size and color.
text("Hello", 24, "olive")
text("Goodbye", 36, "indigo")
font-face is system-dependent because different computers and operating systems have different fonts installed. You can try different options for the names of fonts on your machine, and text-font will fall back to a default in the given family if it can’t find the one provided.
- text-font :: (
- string :: String,
- size :: Number,
- color :: ImageColor,
- font-face :: String,
- font-family :: FontFamily,
- style :: FontStyle,
- weight :: FontWeight,
- underline :: Boolean
- )
- -> Image
Like text, constructs an image that draws the given string, but makes use of a complete font specification. The various style options are described below.
text-font("Hello", 24, "green", "Gill Sans",
          "swiss", "italic", "normal", true)
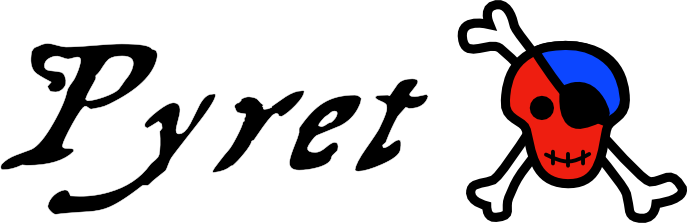
text-font("Goodbye", 36, "turquoise", "Treasure Map Deadhand",
          "decorative", "normal", "normal", false)
3.1.16.3.1 Data types for text images
The image library |
| The image-typed library |
|
|
|
| ||
|
| |
| ||
|
| |
| ||
|
| |
| ||
|
| |
| ||
|
| |
| ||
|
| |
| ||
|
| |
| ||
|
|
The image library |
| The image-typed library |
|
| |
| ||
|
| |
| ||
|
| |
| ||
|
|
The image library |
| The image-typed library |
|
|
|
| ||
|
| |
| ||
|
| |
| ||
|
|
3.1.16.4 Polygons
- triangle :: (
- side-length :: Number,
- mode :: FillMode,
- color :: ImageColor
- )
- -> Image
Constructs an image of an upward-pointing equilateral triangle. Each side will be of length side-length.
triangle(40, "solid", "tan")
- right-triangle :: (
- side-length1 :: Number,
- side-length2 :: Number,
- mode :: FillMode,
- color :: ImageColor
- )
- -> Image
Constructs an image of a triangle with a right angle at the bottom-left corner and where the two sides adjacent to the right angle have lengths side-length1 and side-length2.
right-triangle(36, 48, "solid", "steel blue")
- isosceles-triangle :: (
- side-length :: Number,
- angle-c :: Number,
- mode :: FillMode,
- color :: ImageColor
- )
- -> Image
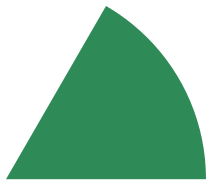
Constructs an image of a triangle with two equal-length sides, of length side-length where the angle between those two sides is angle-c. if the angle is less than 180, then the triangle will point up; otherwise, the triangle will point down.
isosceles-triangle(200, 170, "solid", "sea-green")
isosceles-triangle(60, 30, "solid", "royal-blue")
isosceles-triangle(60, 330, "solid", "dark-magenta")
- triangle-sss :: (
- side-a :: Number,
- side-b :: Number,
- side-c :: Number,
- mode :: FillMode,
- color :: ImageColor
- )
- -> Image
Constructs an image of a triangle using the three given sides.
triangle-sss(40, 60, 80, "solid", "sea-green")
triangle-sss(80, 40, 60, "solid", "royal-blue")
triangle-sss(80, 80, 40, "solid", "dark-magenta")
- triangle-ass :: (
- angle-a :: Number,
- side-b :: Number,
- side-c :: Number,
- mode :: FillMode,
- color :: ImageColor
- )
- -> Image
Constructs an image of a triangle using the given angle and two sides.
triangle-ass(10, 60, 100, "solid", "sea-green")
triangle-ass(90, 60, 100, "solid", "royal-blue")

triangle-ass(130, 60, 100, "solid", "dark-magenta")

- triangle-sas :: (
- side-a :: Number,
- angle-b :: Number,
- side-c :: Number,
- mode :: String,
- color :: ImageColor
- )
- -> Image
Constructs an image of a triangle using the given angle and two sides.
triangle-sas(60, 10, 100, "solid", "sea-green")
triangle-sas(60, 90, 100, "solid", "royal-blue")

triangle-sas(60, 130, 100, "solid", "dark-magenta")

- triangle-ssa :: (
- side-a :: Number,
- side-b :: Number,
- angle-c :: Number,
- mode :: String,
- color :: ImageColor
- )
- -> Image
Constructs an image of a triangle using the given angle and two sides.
triangle-ssa(60, 100, 10, "solid", "sea-green")
triangle-ssa(60, 100, 90, "solid", "royal-blue")

triangle-ssa(60, 100, 130, "solid", "dark-magenta")
- triangle-aas :: (
- angle-a :: Number,
- angle-b :: Number,
- side-c :: Number,
- mode :: String,
- color :: ImageColor
- )
- -> Image
Constructs an image of a triangle using the two given angles and side.
triangle-aas(10, 40, 200, "solid", "sea-green")
triangle-aas(90, 40, 200, "solid", "royal-blue")
triangle-aas(130, 40, 40, "solid", "dark-magenta")

- triangle-asa :: (
- angle-a :: Number,
- side-b :: Number,
- angle-c :: Number,
- mode :: String,
- color :: ImageColor
- )
- -> Image
Constructs an image of a triangle using the two given angles and side.
triangle-asa(10, 200, 40, "solid", "sea-green")
triangle-asa(90, 200, 40, "solid", "royal-blue")
triangle-asa(130, 40, 40, "solid", "dark-magenta")
- triangle-saa :: (
- side-a :: Number,
- angle-b :: Number,
- angle-c :: Number,
- mode :: String,
- color :: ImageColor
- )
- -> Image
Constructs an image of a triangle using the two given angles and sides.
triangle-saa(200, 10, 40, "solid", "sea-green")
triangle-saa(200, 90, 40, "solid", "royal-blue")
triangle-saa(40, 130, 40, "solid", "dark-magenta")
- square :: (
- side-length :: Number,
- mode :: String,
- color :: ImageColor
- )
- -> Image
Constructs an image of a square with the given side length, mode and color.
square(40, "solid", "slate-blue")
square(50, "outline", "light-steel-blue")
Constructs an image of a rectangle with the given side width, height, mode and color.
rectangle(60, 30, "outline", "black")
rectangle(30, 60, "solid", "blue")
Constructs a four-sided polygon whose sides are of length side-length and thus has angles equal to their opposites. The top and bottom pair of angles is angle and the left and right pair is 180 - angle.
rhombus(40, 45, "solid", "magenta")
rhombus(80, 150, "solid", "medium-purple")
- star :: (
- side-length :: Number,
- mode :: String,
- color :: ImageColor
- )
- -> Image
Constructs a five-pointed star with sides of length side-length, and with the given mode and color.
star(40, "solid", "gray")

- radial-star :: (
- point-count :: Number,
- outer :: Number,
- inner :: Number,
- mode :: String,
- color :: ImageColor
- )
- -> Image
Constructs a star with point-count points. The outer points will lie a distance of outer from the center of the star, while the inner points will lie a distance of inner from the center.
radial-star(8, 28, 64, "solid", "dark-green")
radial-star(32, 30, 40, "outline", "black")
- star-sized :: (
- point-count :: Number,
- outer :: Number,
- inner :: Number,
- mode :: String,
- color :: ImageColor
- )
- -> Image
Same as radial-star.
- star-polygon :: (
- side-length :: Number,
- point-count :: Number,
- step :: Number,
- mode :: String,
- color :: ImageColor
- )
- -> Image
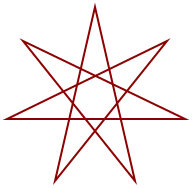
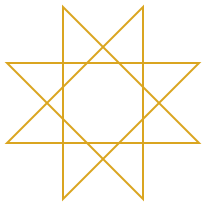
Constructs an image of an arbitrary regular star polygon. The polygon is enclosed by a regular polygon with side-count sides each side-length long. The polygon is actually constructed by going from vertex to vertex around the regular polygon, but connecting every step-count-th vertex (i.e., skipping every step-count - 1 vertices).
star-polygon(40, 5, 2, "solid", "sea-green")

star-polygon(40, 7, 3, "outline", "dark-red")
star-polygon(40, 8, 3, "outline", "goldenrod")
star-polygon(20, 10, 3, "solid", "cornflower-blue")

- regular-polygon :: (
- length :: Number,
- count :: Number,
- mode :: String,
- color :: ImageColor
- )
- -> Image
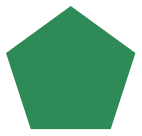
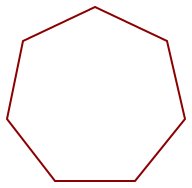
Constructs an image of a regular polygon with side-count sides.
regular-polygon(40, 5, "solid", "sea-green")
regular-polygon(40, 7, "outline", "dark-red")
regular-polygon(40, 8, "outline", "goldenrod")
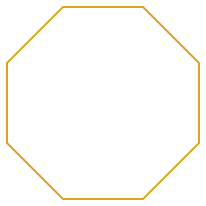
regular-polygon(20, 8, "solid", "cornflower-blue")

- point-polygon :: (
- points :: List<Point>,
- mode :: FillMode,
- color :: ImageColor
- )
- -> Image
Creates a polygon whose corners are specified by the given list of points.
point-polygon(
  [list: point(0, 0), point(-10, 20), point(60, 0), point(-10, -20)],
  "solid", "burlywood")
fun deg-to-rad(t):
  t * (~3.14159265358979323 / 180)
end
points = for map(n from [list: 0, 1, 2, 3, 4, 5]):
  point-polar(30, deg-to-rad(60 * n))
end
draw-pinhole(point-polygon(points, "outline", "steel-blue"))
3.1.16.5 Other images
Draws a pie-shaped section of a circle. The pinhole of the resulting image is at the center of the circle from which this wedge is cut. The angle is measured in degrees, measured counterclockwise from the positive x-axis.
wedge(100, 60, "solid", "sea-green")
3.1.16.6 Overlaying Images
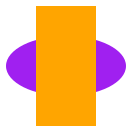
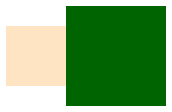
Constructs a new image where img1 overlays img2. The two images are aligned at their pinholes, so overlay(img1, img2) behaves like overlay-align("pinhole", "pinhole", img1, img2).
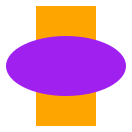
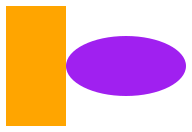
overlay(rectangle(30, 60, "solid", "orange"),
  ellipse(60, 30, "solid", "purple"))
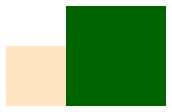
Overlays img1 on img2 like overlay, but uses place-x and place-y to determine the alignment point in each image. A call to overlay-align(place-x, place-y, img1, img2) behaves the same as overlay-onto-offset(img1, place-x, place-y, 0, 0, img2, place-x, place-y)
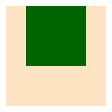
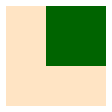
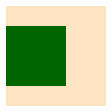
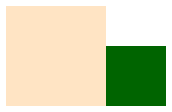
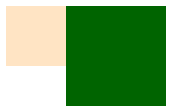
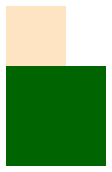
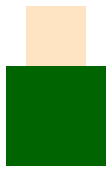
overlay-align("left", "bottom",
  square(30, "solid", "bisque"), square(50, "solid", "dark-green"))

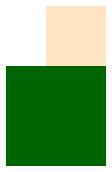
overlay-align("center", "top",
  square(30, "solid", "bisque"), square(50, "solid", "dark-green"))
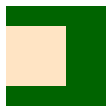
overlay-align("right", "middle",
  square(30, "solid", "bisque"), square(50, "solid", "dark-green"))
Overlays img1 on img2 like overlay, but initially lines up the two images upper-left corners and then shifts img2 to the right by dx pixels, and then down by dy pixels. A call to overlay-xy(img1, dx, dy, img2) behaves the same as overlay-onto-offset(img1, "left", "top", dx, dy, img2, "left", "top").
overlay-xy(square(30, "solid", "bisque"),
  0, 0,
  square(50, "solid", "dark-green"))

overlay-xy(square(30, "solid", "bisque"),
  30, 20, # Move green square right 30 and down 20
  square(50, "solid", "dark-green"))
overlay-xy(square(30, "solid", "bisque"),
  -10, -20, # Move green square left 10 and up 20
  square(50, "solid", "dark-green"))
Overlays img1 on img2 like overlay, but uses place-x1 and place-y1 to choose the reference point for the first image, place-x2 and place-y2 to choose the reference point for the second image, and slides the second image’s reference point down and to the right by offset-x and offset-y.
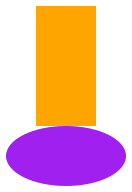
Constructs a new image by placing img1 under img2. This is the reverse of overlay.
underlay(rectangle(30, 60, "solid", "orange"),
  ellipse(60, 30, "solid", "purple"))
Underlays img1 beneath img2 like underlay, but uses place-x and place-y to determine where the images should line up. This is the reverse of overlay-align.
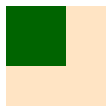
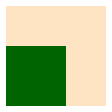
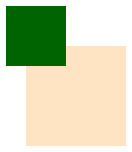
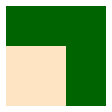
underlay-align("left", "top",
  square(50, "solid", "bisque"), square(30, "solid", "dark-green"))

underlay-align("center", "top",
  square(50, "solid", "bisque"), square(30, "solid", "dark-green"))
underlay-align("middle", "top",
  square(50, "solid", "bisque"), square(30, "solid", "dark-green"))

underlay-align("right", "top",
  square(50, "solid", "bisque"), square(30, "solid", "dark-green"))
underlay-align("left", "top",
  square(50, "solid", "bisque"), square(30, "solid", "dark-green"))
underlay-align("left", "middle",
  square(50, "solid", "bisque"), square(30, "solid", "dark-green"))
underlay-align("left", "center",
  square(50, "solid", "bisque"), square(30, "solid", "dark-green"))

underlay-align("left", "bottom",
  square(50, "solid", "bisque"), square(30, "solid", "dark-green"))
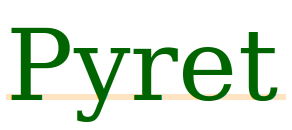
underlay-align("left", "baseline",
  rectangle(140, 3, "solid", "bisque"), text("Pyret", 50, "dark-green"))
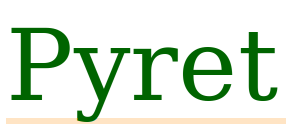
underlay-align("left", "bottom",
  rectangle(140, 3, "solid", "bisque"), text("Pyret", 50, "dark-green"))
Underlays img1 beneath img2 like underlay, but initially lines up the two images upper-left corners and then shifts img2 to the right by x pixels, and then down by y pixels. This is the reverse of overlay-xy.
underlay-xy(square(50, "solid", "bisque"),
  0, 0,
  square(30, "solid", "dark-green"))

underlay-xy(square(50, "solid", "bisque"),
  50, 20, # Move green square right 50 and down 20
  square(30, "solid", "dark-green"))
underlay-xy(square(50, "solid", "bisque"),
  -10, -20, # Move green square left 10 and up 20
  square(30, "solid", "dark-green"))
Constructs an image by placing img1 to the left of img2.
beside(rectangle(30, 60, "solid", "orange"),
  ellipse(60, 30, "solid", "purple"))
- beside-align :: (
- place-y :: YPlace,
- img1 :: Image,
- img2 :: Image
- )
- -> Image
Constructs an image by placing img1 to the left of img2, and aligning the two images as indicated by place-y.
beside-align("top",
  square(30, "solid", "bisque"), square(50, "solid", "dark-green"))
beside-align("middle",
  square(30, "solid", "bisque"), square(50, "solid", "dark-green"))
beside-align("center",
  square(30, "solid", "bisque"), square(50, "solid", "dark-green"))

beside-align("bottom",
  square(30, "solid", "bisque"), square(50, "solid", "dark-green"))
beside-align("baseline",
  text("Hello", 30, "dark-green"), text(" Pyret", 18, "lawn-green"))
above(rectangle(30, 60, "solid", "orange"),
  ellipse(60, 30, "solid", "purple"))
- above-align :: (
- place-x :: XPlace,
- img1 :: Image,
- img2 :: Image
- )
- -> Image
Constructs an image by placing img1 above img2, and aligning the two images as indicated by place-x.
above-align("left",
  square(30, "solid", "bisque"), square(50, "solid", "dark-green"))
above-align("center",
  square(30, "solid", "bisque"), square(50, "solid", "dark-green"))

above-align("middle",
  square(30, "solid", "bisque"), square(50, "solid", "dark-green"))
above-align("right",
  square(30, "solid", "bisque"), square(50, "solid", "dark-green"))
3.1.16.6.1 Data types for aligning images
The image library |
| The image-typed library |
|
| |
| ||
|
|
|
| ||
|
| |
| ||
|
|
|
| ||
|
|
|
overlay-align("left", "top",
  square(30, "solid", "bisque"), square(50, "solid", "dark-green"))

overlay-align("center", "top",
  square(30, "solid", "bisque"), square(50, "solid", "dark-green"))

overlay-align("middle", "top",
  square(30, "solid", "bisque"), square(50, "solid", "dark-green"))

overlay-align("right", "top",
  square(30, "solid", "bisque"), square(50, "solid", "dark-green"))

The image library |
| The image-typed library |
|
| |
| ||
|
|
|
| ||
|
| |
| ||
|
|
|
| ||
|
|
|
| ||
|
|
|
overlay-align("left", "top",
  square(30, "solid", "bisque"), square(50, "solid", "dark-green"))

overlay-align("left", "middle",
  square(30, "solid", "bisque"), square(50, "solid", "dark-green"))
overlay-align("left", "center",
  square(30, "solid", "bisque"), square(50, "solid", "dark-green"))

overlay-align("left", "bottom",
  square(30, "solid", "bisque"), square(50, "solid", "dark-green"))
overlay-align("left", "baseline",
  rectangle(140, 3, "solid", "bisque"), text("Pyret", 50, "dark-green"))
overlay-align("left", "bottom",
  rectangle(140, 3, "solid", "bisque"), text("Pyret", 50, "dark-green"))

3.1.16.7 Placing Images & Scenes
- empty-scene :: (
- width :: Number,
- height :: Number
- )
- -> Scene
Construct an empty scene of given width and height. The background is transparent, and a black frame is drawn around the outside of the scene.
empty-scene(30, 40)
- empty-color-scene :: (
- width :: Number,
- height :: Number,
- color :: ImageColor
- )
- -> Scene
Construct an empty scene of given width and height. The background is the given color, and a black frame is drawn around the outside of the scene.
empty-color-scene(30, 40, "red")
empty-image # Not much to see here!
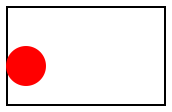
Places the image img on the scene background so that its center is located at the coordinates (x,y), cropping the resulting image as necessary to maintain the size of background. The coordinates are relative to the bottom-left of background (i.e., Quadrant I of the Cartesian plane).
put-image(
  circle(10, "solid", "red"),
  10, 20,
  empty-scene(80, 50))
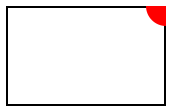
put-image(
  circle(10, "solid", "red"),
  80, 50,
  empty-scene(80, 50))
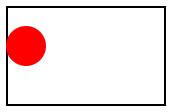
Places the image img on the scene background so that its center is located at the coordinates (x,y), cropping the resulting image as necessary to maintain the size of background. The coordinates are relative to the top-left of background (i.e. standard screen coordinates).
place-image(
  circle(10, "solid", "red"),
  10, 20,
  empty-scene(80, 50))
place-image(
  circle(10, "solid", "red"),
  80, 50,
  empty-scene(80, 50))
Behaves similar to place-image, but uses place-x and place-y to determine where to anchor img, instead of always using the center.
place-image-align(
  star(15, "solid", "red"),
  80, 50, "center", "center"
  empty-scene(80, 50))
place-image-align(
  star(15, "solid", "red"),
  80, 50, "right", "bottom",
  empty-scene(80, 50))
Draws a line from (x1,y1) to (x2,y2) on the scene background in the given color. Unlike add-line, this function crops the resulting scene to be the same size as background.
scene-line(circle(20, "outline", "maroon"), 0, 40, 40, 0, "orange")
scene-line(rectangle(40, 40, "outline", "maroon"), -10, 50, 50, -10, "orange")
3.1.16.8 Rotating, Scaling, Flipping, Cropping and Framing Images
rotate(40, ellipse(60, 20, "solid", "olive-drab"))

rotate(5, square(50, "outline", "black"))
rotate(45,
  beside-align("center",
    rectangle(40, 20, "solid", "dark-sea-green"),
    rectangle(20, 100, "solid", "light-sea-green")))

scale(2, ellipse(20, 30, "solid", "blue"))
ellipse(40, 60, "solid", "blue")
Scales by x-factor horizontally and by y-factor vertically.
scale-xy(2, 3, circle(10, "solid", "blue"))
ellipse(40, 60, "solid", "blue")
- flip-horizontal :: (
- img :: Image
- )
- -> Image
Flips img left to right.
flip-horizontal(text("Hello", 40, "darkgreen"))
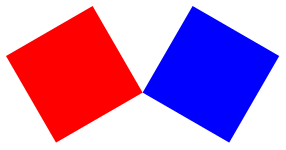
beside(
  rotate(30, square(50, "solid", "red")),
  flip-horizontal(rotate(30, square(50, "solid", "blue"))))
- flip-vertical :: (
- img :: Image
- )
- -> Image
Flips img top to bottom.
flip-vertical(text("Hello", 40, "darkgreen"))
above(
  star(40, "solid", "fire-brick"),
  scale-xy(1, 1/2, (flip-vertical(star(40, "solid", "gray")))))

Crops img to the rectangle with the upper left at the point (x,y) and with width width and height height.
crop(0, 0, 40, 40, circle(40, "solid", "chocolate"))
crop(40, 60, 40, 60, ellipse(80, 120, "solid", "dodger-blue"))
above(
  beside(
    crop(40, 40, 40, 40, circle(40, "solid", "pale-violet-red")),
    crop(0, 40, 40, 40, circle(40, "solid", "light-coral"))),
  beside(
    crop(40, 0, 40, 40, circle(40, "solid", "light-coral")),
    crop(0, 0, 40, 40, circle(40, "solid", "pale-violet-red"))))

Construct an image similar to img, but with a black, single pixel frame drawn around the bounding box of the image.
frame(ellipse(40, 60, "solid", "gray"))
frame(beside(circle(20, "solid", "red"), circle(10, "solid", "blue")))
3.1.16.9 Bitmaps
image-url("https://www.pyret.org/img/pyret-banner.png")
- image-file :: (
- path :: String
- )
- -> Image
Loads the image specified by path, which should be a relative path to a file.
image-file("./pyret-banner.png")
- save-image :: (
- image :: Image,
- path :: String
- )
- -> Image
Saves the the image into the file path, which should be a relative path to a file. Returns the original image.
i = image-file("./pyret-banner.png")
save-image(i, "./pyret-banner-copy.png")
image-file("./pyret-banner-copy.png")
- color-at-position :: (
- image :: Image,
- x :: Number,
- y :: Number
- )
- -> Color
Returns the color at the pixel given by x and y coordinates. The coordinates are 0-based, with 0, 0 in the top-left corner of the image.
- image-to-color-list :: (
- image :: Image
- )
- -> List<Color>
Returns a list of colors that correspond to the colors in the image, reading from left to right, top to bottom.
image-to-color-list(rectangle(2, 2, "solid", "black"))
black, black, black, black]image-to-color-list(above( beside(square(1, "solid", "red"), square(1, "solid", "blue")), beside(square(1, "solid", "green"), square(1, "solid", "yellow"))))
red, blue, green, yellow]- color-list-to-image :: (
- list :: List<ImageColor>,
- width :: Number,
- height :: Number,
- pinhole-x :: Number,
- pinhole-y :: Number
- )
- -> Image
Given a list of colors, creates an image with the given width width and height height. The pinhole arguments specify where to place the pinhole of the image.
scale(20, color-list-to-image([list: "red", "blue", "green", "yellow"], 2, 2, 1, 1))
scale(20, color-list-to-image([list: "red", "blue", "green", "yellow"], 4, 1, 1, 1))
Same as color-list-to-image, but places the pinhole at the center of the image (i.e. width / 2 and height / 2).
3.1.16.10 Pinholes
When combining images with overlay-align or related functions, we need to specify which reference point in each image to bring into alignment. Using the various XPlace and YPlace options, we can easily refer to the four corners, the four midpoints of the edges, or the center of the image. But frequently, the "obvious" alignment point is not quite any of those. Suppose we wanted to create a six-pointed star by overlaying two equilateral triangles:
overlay-align("middle", "center", triangle(50, "solid", "red"),
              rotate(180, triangle(50, "solid", "blue")))
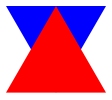
Unfortunately, the center of our triangles isn’t the visual center of our triangles, but instead is exactly half the triangles’ heights. To fix this, Pyret defines a notion of a pinhole, which lets us specify one more point in our images, where we’d like to pin images together. By default, Pyret’s pinhole of polygon images is at the centroid of the polygon, which is the average of the coordinates of each corner.
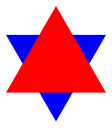
If we use our pinholes to align these triangles, we get the more intuitive result:
overlay-align("pinhole", "pinhole", triangle(50, "solid", "red"),
              rotate(180, triangle(50, "solid", "blue")))
When two images are overlaid, the pinhole of the resulting image is the pinhole of the second image.
- move-pinhole :: (
- dx :: Number,
- dy :: Number,
- img :: Image
- )
- -> Image
Produces a new image just like the original, but where the pinhole has been offset down and to the right by dx and dy.
- place-pinhole :: (
- x :: Number,
- y :: Number,
- img :: Image
- )
- -> Image
Produces a new image just like the original, but where the pinhole has been placed at x and y, relative to the top-left corner of the image.
- center-pinhole :: (
- img :: Image
- )
- -> Image
Produces a new image just like the original, but where the pinhole has been placed at the geometric center of the image (exactly at half its width and half its height).
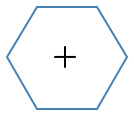
- draw-pinhole :: (
- img :: Image
- )
- -> Image
Produces a new image just like the original, but draws a small crosshatch at the location of the pinhole. Useful for debugging where the pinholes of images currently are.
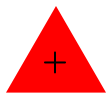
draw-pinhole(triangle(50, "solid", "red"))
draw-pinhole(center-pinhole(triangle(50, "solid", "tan")))
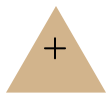
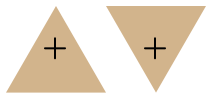
This last one looks strange, but it is an optical illusion. Flipping the image vertically reveals that the pinhole really is centered:
beside(
  draw-pinhole(center-pinhole(triangle(50, "solid", "tan"))),
  draw-pinhole(rotate(180, center-pinhole(triangle(50, "solid" , "tan")))))
3.1.16.11 Image Properties
- image-width :: (
- img :: Image
- )
- -> Number
Returns the width of img.
image-width(circle(30, "solid", "red"))
image-width(text("Pyret", 30, "green"))
- image-height :: (
- img :: Image
- )
- -> Number
Returns the height of img.
image-height(rectangle(30, 40, "solid", "red"))
image-height(text("Pyret", 30, "green"))
- image-baseline :: (
- img :: Image
- )
- -> Number
Returns the distance from the top of img to its baseline. The baseline of an image is the place where the bottoms of letters line up, without counting the descender, such as the tails on "y", "g" or "j".
image-baseline(rectangle(30, 40, "solid", "red"))
image-baseline(text("Pyret", 30, "green"))
- image-pinhole-x :: (
- img :: Image
- )
- -> Number
Returns the distance from the left of img to its pinhole.
image-pinhole-x(circle(30, "solid", "red"))
image-pinhole-x(text("Pyret", 30, "green"))
- image-pinhole-y :: (
- img :: Image
- )
- -> Number
Returns the distance from the top of img to its pinhole.
image-pinhole-y(circle(30, "solid", "red"))
image-height(star(40, "solid", "green"))
image-pinhole-y(star(40, "solid", "green"))
3.1.16.12 Image Predicates
- is-image-color :: (
- maybe-color :: Any
- )
- -> Boolean
Checks if maybe-color can be used as a color. Strings, if names of colors (e.g. "red" or "green") can also be used, if they exist in the color database. This function is only defined in the image library.
- is-y-place :: (
- maybe-y-place :: Any
- )
- -> Boolean
Checks if maybe-y-place can be used as y-place in appropriate functions. Valid strings are "top", "bottom", "middle", "center", "baseline" and "pinhole". This function is only defined in the image library.
- is-x-place :: (
- maybe-x-place :: String
- )
- -> Boolean
Checks if maybe-x-place can be used as x-place in appropriate functions. Valid strings are "left", "right", "middle", "center" and "pinhole". This function is only defined in the image library.
Checks if maybe-angle is an angle, namely a real number. All angles in the library are in degrees.
- is-side-count :: (
- side-count :: Any
- )
- -> Boolean
Checks if maybe-side-count is an integer greater than or equal to 3.
- is-step-count :: (
- step-count :: Number
- )
- -> Boolean
Checks if maybe-step-count is an integer greater than or equal to 1.
3.1.16.13 Image Equality
- images-equal :: (
- image1 :: Image,
- image2 :: Image
- )
- -> Boolean
Compares two images for equality.
Compares two images for approximate equality. Returns left if they aren’t the same size (and are thus incomparable). Returns right otherwise, with a number representing how far off they are.
Numbers range from 0-255, where around 255 indicates completely different images, and numbers below 20 or so are very difficult to distinguish at a glance. Useful for testing against reference images (especially cross-browser).